 I will say, always make sure the lanterns are supervised, especially with little ones around! But, here’s what you need to make your own lanterns:
Showing posts sorted by relevance for query wax paper. Sort by date Show all posts
Showing posts sorted by relevance for query wax paper. Sort by date Show all posts
Wednesday, November 6, 2013
Fall Leaf Lanterns
Here’s a quick, fun craft to help you and your little ones celebrate the beautiful leaves falling all around, similar to our leaf placemats and inspired by Red Ted Art. Cute leaf lanterns can help make dinner a little more fun or would be nice to just sit by on a cool fall night. I will say, always make sure the lanterns are supervised, especially with little ones around! But, here’s what you need to make your own lanterns:
I will say, always make sure the lanterns are supervised, especially with little ones around! But, here’s what you need to make your own lanterns:

Monday, October 1, 2012
Stained Glass Leaves
Inspired by the stained glass hearts we made forever ago, I decided to get into the fall spirit with my boys by making stained glass leaves…


All you have to do is have your little ones sharpen several fall colored crayons and keep the shavings…
Thursday, January 21, 2010
Stained Glass Hearts
Living in an apartment greatly limits how much stuff we can store, and how much stuff I care to move when the time comes. One of the things that is extremely limited is holiday decorations. I love decorating, but I can't stand the thought of moving them, so we make our own.

Last week K and I made Stained Glass Hearts, which I found at Skip to My Lou and they were so fun to make!

All you need is wax paper, pencil sharpener, crayons, an iron and scissors!
K helped me find all the broken crayons with Valentines colors and I shaved them in a pencil sharpener. We then sprinkled the shavings on the waxy side of a sheet of wax paper, and covered it with another sheet of wax paper (wax side down). It's best to have blank paper, or a brown paper bag under and on top of the wax paper to prevent making a mess of your iron and ironing board.
Then you iron. It only takes a few seconds, so make sure you check often.
Let it cool and cut out into heart shapes. Older kids can trace the hearts and cut them out, but K was content to watch and count the hearts as I cut them out.
K was so excited to go through and show off all of the hearts! He insisted on my taking a picture of all of them, and how can I refuse such a face?

We hung some up with red thread and the rest are on our back door, allowing the sunshine to show off the pretty colors. The first night after we made them and I closed the blinds K cried until I promised that the hearts would come back out the next day.

Wednesday, January 19, 2011
Peppermint Patties
Every recipe has a history right? Even if it’s your first time making it, it came from somewhere. I knew I was in trouble when Jessie Leigh of Parenting the Tiniest of Miracles shared a recipe for homemade peppermint patties, which she found in Family Fun Magazine. 
I had meant to make these for goody plates over the holidays for friends, but figure these are perfect any time of the year.

I had meant to make these for goody plates over the holidays for friends, but figure these are perfect any time of the year.
Tuesday, September 23, 2014
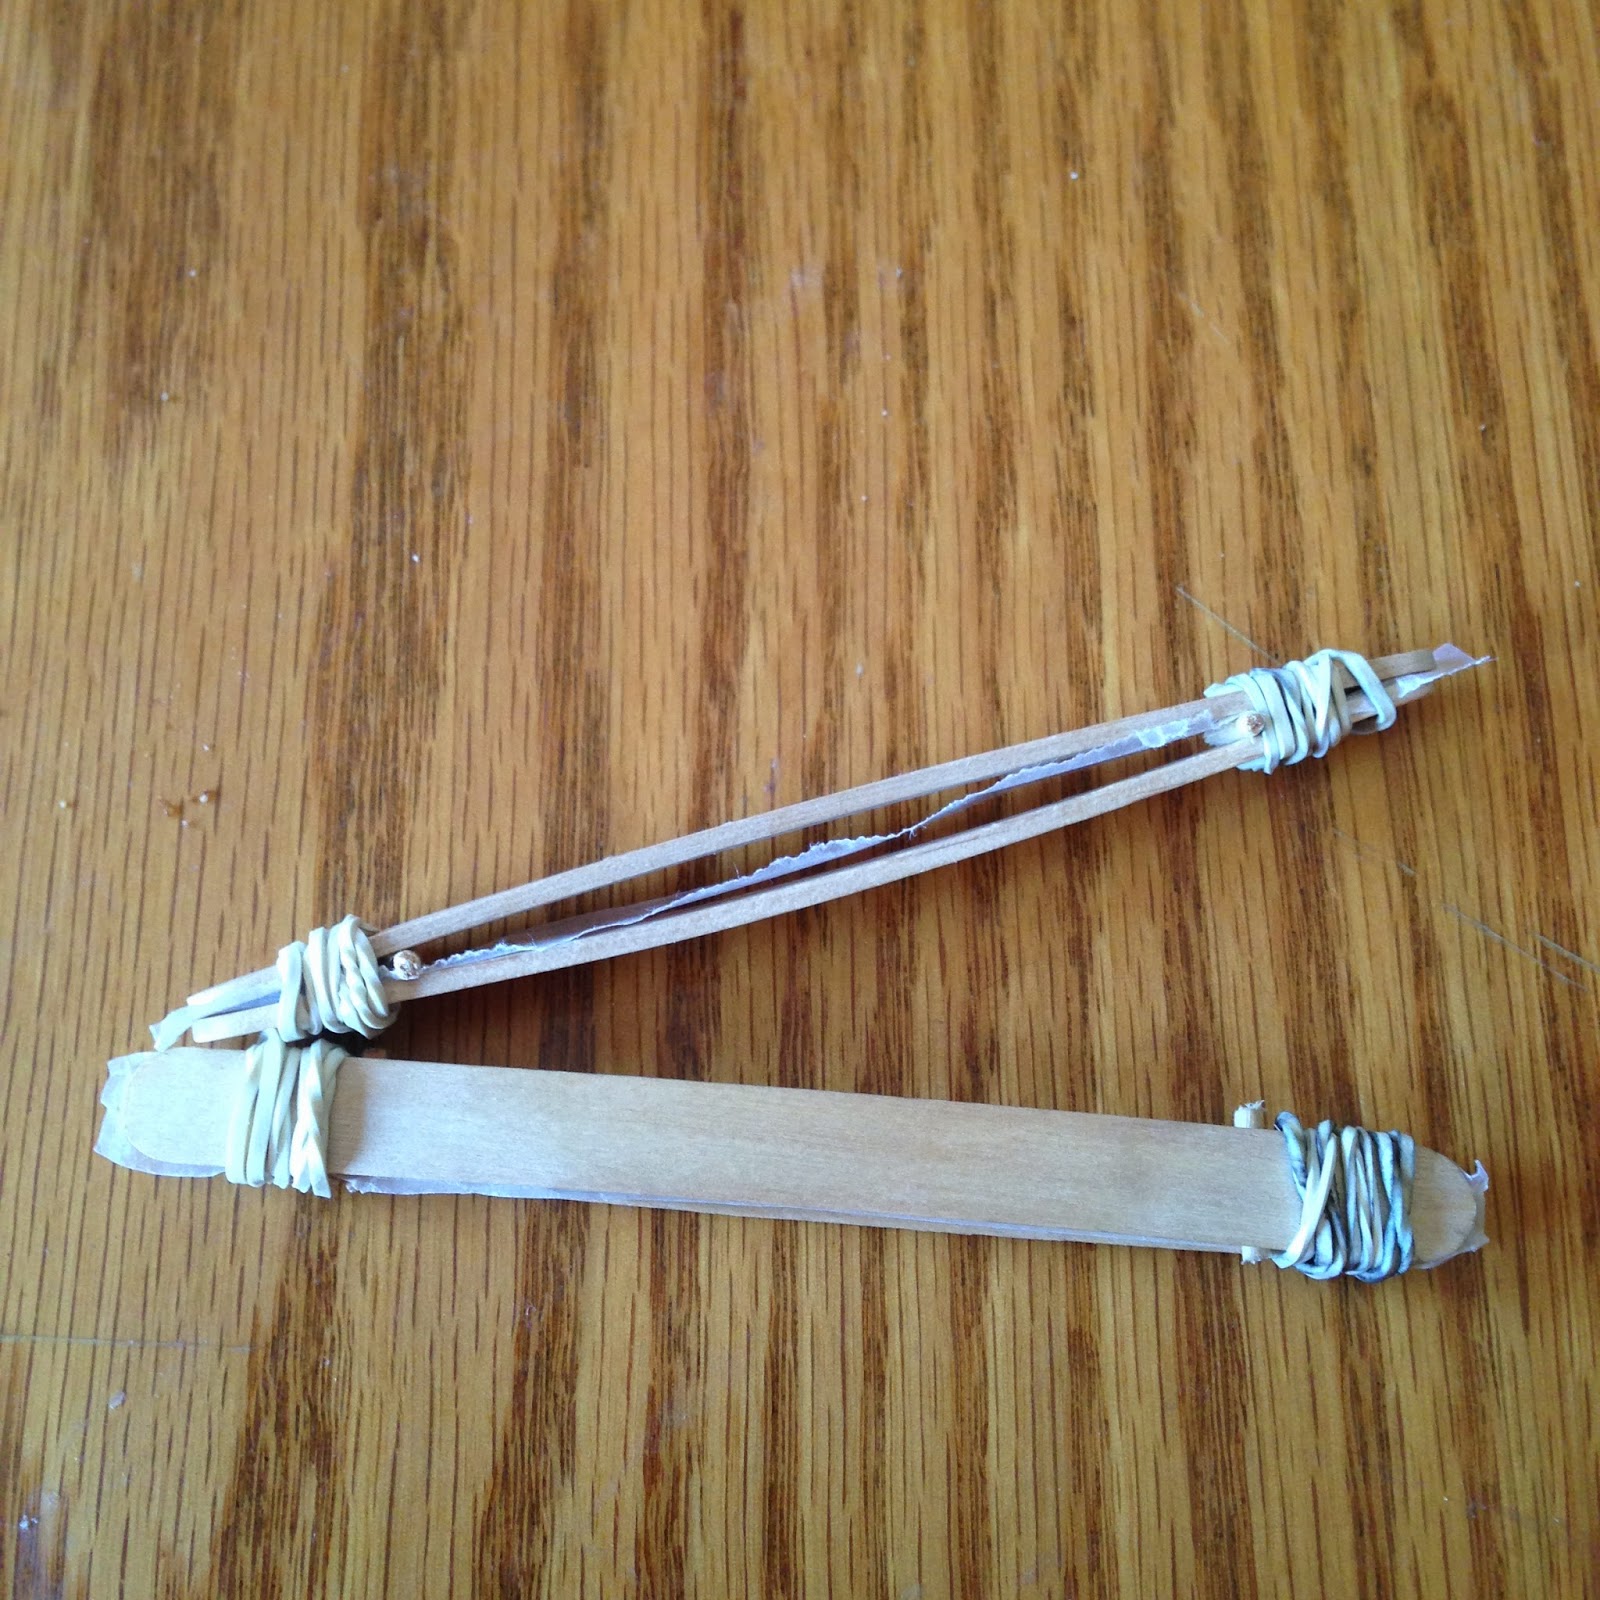
Popsicle Stick Buzzing Toy
With your kids, you can make a fun toy that will make your ears and lips buzz!
Friday, December 4, 2009
Fall Placemats
We actually made these a while ago, but I had so much fun with these and they are so cheap to make!

I had been looking for fun things to do with my toddler to keep us busy and had seen on several blogs the idea to do placemats with pressed leaves. The problem was, they all required contact paper and I don't have any, and don't want to buy any for the sake of saving money and trying to prevent an overabundance of junk. Then, our city sent out a mailer and suggested doing it with wax paper.
They aren't the fanciest looking placemats but it was cheap, super easy and fun. Plus, I don't have to feel terrible when they get destroyed which is just inevitable with a toddler.
We collected leaves and pressed them in our phone book. K loved (!) this. He got to carry around a bucket to collect the leaves in. After the leaves are pressed, have your kids arrange everything on one sheet of wax paper. Cover the leaves with another sheet of wax paper and sandwich your place-mat inside a paper bag to prevent wax from sticking to your iron. Iron your place-mat to melt the wax together around the leaves and you have yourselves a festive, cheap table decoration.
K loves these and has started to understand the concept of M for Mommy, D for Daddy, and K for him.

I had been looking for fun things to do with my toddler to keep us busy and had seen on several blogs the idea to do placemats with pressed leaves. The problem was, they all required contact paper and I don't have any, and don't want to buy any for the sake of saving money and trying to prevent an overabundance of junk. Then, our city sent out a mailer and suggested doing it with wax paper.
They aren't the fanciest looking placemats but it was cheap, super easy and fun. Plus, I don't have to feel terrible when they get destroyed which is just inevitable with a toddler.
We collected leaves and pressed them in our phone book. K loved (!) this. He got to carry around a bucket to collect the leaves in. After the leaves are pressed, have your kids arrange everything on one sheet of wax paper. Cover the leaves with another sheet of wax paper and sandwich your place-mat inside a paper bag to prevent wax from sticking to your iron. Iron your place-mat to melt the wax together around the leaves and you have yourselves a festive, cheap table decoration.
K loves these and has started to understand the concept of M for Mommy, D for Daddy, and K for him.
Friday, June 25, 2010
Tie Dye Cookies
One of the things I love about Google Reader is the fact you can share cool things with your reader buddies. One of my friends shared this with my boys in mind and it was a blast! Despite my reluctance to make sugar cookies, these tie dye cookies are the coolest things since, well, tie dye cupcakes (which I still have to make with K)… For the cookies, I halved Baked Bree’s Sugar Cookies as follows: For the cookies, I halved Baked Bree’s Sugar Cookies as follows:
  Kids are great for pouring in ingredients or measuring when they’re older…they’re also great at spreading the spilled ingredients all over the counter as if they were a bulldozer. Now for the fun part! Separate your dough into however many bowls you want colors of. Add a few drops of food coloring and mix until the color is evenly distributed. This is also great for kids, though K refused to participate because it was sticky. Have your little helper grab globs of each color and smoosh it into a log-like blob on a sheet of wax paper. For some reason, the stickiness was no longer an issue because K was more than willing to help. Ours turned into an alligator with eyes and legs :) When all the dough is smooshed together, gently roll it into more of a log, wrap the wax paper around it and chill for about 2 hours.   Preheat your oven to 350 degrees once the dough is chilled. Slice the dough into 1/4 inch thick disks (without the wax paper of course). Have your helper arrange said dough on cookie sheets. Bake for 8-10 minutes, being sure to not let the edges brown. This batch made almost 3 dozen cookies.  Let cool completely and devour! Let cool completely and devour!  I think I’ve met my sugar cookie quota for the next 3 months! I think I’ve met my sugar cookie quota for the next 3 months!  |


Linking up to: Creative Chick Parade @ Trendy Treehouse and Cheffie Jo's
Wednesday, September 29, 2010
Freezer Paper Stenciling
Using freezer paper as a stencil is all the rage lately...actually, I think the fad has passed for the most part and it just took me forever to get on the bandwagon. Do you know how hard it can be to find freezer paper? I searched at 5 different stores until I went to another grocery store across town and found it there. Look in large grocery stores! Trust me, when you do find it, it will be worth the money.

Ok, print out the design or shapes or whatever that you want to stencil. Trace or draw that onto the paper side of your freezer paper (the other side will feel waxy...no this doesn't work on wax paper).
Cut out your shape. Make sure you keep all the pieces that you cut out of holes and that your main shape's stencil or outline stays in one piece. I used an Xacto knife for this.
Arrange your shapes on your fabric and lightly iron it on with the wax side down or facing your fabric. Make sure you include all the pieces that will fill holes you don't want painted, such as the hole in my number 6.
Use fabric paint and paint your design.
Peel off the freezer paper and voila! I have so many things I want to try this on, but all in due time, right?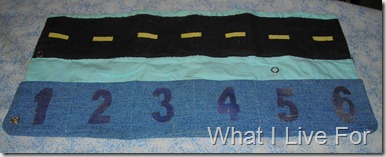 (Remember my car caddy?)
I've even heard you can use these stencils more than once if you really like them! Seriously...try it!
Thank you Jaime @ Trendy Treehouse for the inspiration!

Ok, print out the design or shapes or whatever that you want to stencil. Trace or draw that onto the paper side of your freezer paper (the other side will feel waxy...no this doesn't work on wax paper).
Cut out your shape. Make sure you keep all the pieces that you cut out of holes and that your main shape's stencil or outline stays in one piece. I used an Xacto knife for this.

Arrange your shapes on your fabric and lightly iron it on with the wax side down or facing your fabric. Make sure you include all the pieces that will fill holes you don't want painted, such as the hole in my number 6.

Use fabric paint and paint your design.

Peel off the freezer paper and voila! I have so many things I want to try this on, but all in due time, right?
 (Remember my car caddy?)
 I've even heard you can use these stencils more than once if you really like them! Seriously...try it!
Thank you Jaime @ Trendy Treehouse for the inspiration!
Monday, October 4, 2010
Candy Corn Sugar Cookies
When I made these cookies, all my husband would say is that I'm obsessed. Who can blame me? These turned out pretty darn cute if I do say so myself!

It is really easy to make these and they are such a fun variation of traditional sugar cookies. They're so cute you don't have to ice them...or you could in a continued candy corn theme.
Mix up a batch of sugar cookies. Separate your dough into 3 bowls. One bowl with about half of your dough. With the other half, take about a third and put that into another bowl, and the rest into your last bowl.
Using food coloring, make your largest bowl of dough yellow, the second largest orange, and leave the smallest bowl white. Mix, mush and smash until you have a uniform color.

Divide each of your colors in half. Take one half of your yellow dough and roll it into a snake. Flatten the top and bottom of it and lay it on wax paper.
Roll half of your orange into a snake the same length as your yellow, flatten the top and bottom a bit and lay that on top of your yellow snake.

Do the same with half of your white dough, but shape into a triangle and lay on top of your orange.
 I had a request to explain the white layer better...hopefully this makes more sense... The above picture is just to show the general shape of your candy corn log (the log is lying on it's side, already chilled). Roll half of your white dough into a log the same length as your orange/yellow log and flatten the sides into a triangle. Put that on top of the orange layer.
Wrap up your tricolored snake with the wax paper and run your hands along the sides to flatten/smooth it out until your snake is more of a long triangle.

Do the same with your other half and allow to chill in the fridge for 2 hours.
Unwrap your logs and either using floss by wrapping it around the log and pulling it across each other, or a knife, cut your dough into 1/4 inch wide slices.
Lay on your cookie sheet and cook for 8-12 minutes.

Wish like crazy you had a window in your oven...pull out and allow to cool on the sheet for 1 minute.

Remove to a cooling rack and devour as soon as they are cool enough to handle. Enjoy!
 I absolutely love C's new cheese smile :)
I'm linking up to Made By You Monday @ Skip to My Lou, Making the World Cuter Monday @ Making the World Cuter, Creative Share Blog Hop @ Trendy Treehouse, Motivate Me Monday @ Keeping it Simple, Mad Skills Monday @ Super Stinky Boys, It's So Very Creative Monday @ It's So Very Creative, and the DIY Project Parade @ The DIY Showoff, Tasty Tuesday @ Beauty and Bedlam, Tempt My Tummy Tuesday @ Blessed with Grace.

It is really easy to make these and they are such a fun variation of traditional sugar cookies. They're so cute you don't have to ice them...or you could in a continued candy corn theme.
Mix up a batch of sugar cookies. Separate your dough into 3 bowls. One bowl with about half of your dough. With the other half, take about a third and put that into another bowl, and the rest into your last bowl.
Using food coloring, make your largest bowl of dough yellow, the second largest orange, and leave the smallest bowl white. Mix, mush and smash until you have a uniform color.

Divide each of your colors in half. Take one half of your yellow dough and roll it into a snake. Flatten the top and bottom of it and lay it on wax paper.
Roll half of your orange into a snake the same length as your yellow, flatten the top and bottom a bit and lay that on top of your yellow snake.

Do the same with half of your white dough, but shape into a triangle and lay on top of your orange.

Wrap up your tricolored snake with the wax paper and run your hands along the sides to flatten/smooth it out until your snake is more of a long triangle.

Do the same with your other half and allow to chill in the fridge for 2 hours.
Unwrap your logs and either using floss by wrapping it around the log and pulling it across each other, or a knife, cut your dough into 1/4 inch wide slices.

Lay on your cookie sheet and cook for 8-12 minutes.

Wish like crazy you had a window in your oven...pull out and allow to cool on the sheet for 1 minute.

Remove to a cooling rack and devour as soon as they are cool enough to handle. Enjoy!
 I absolutely love C's new cheese smile :)
I'm linking up to Made By You Monday @ Skip to My Lou, Making the World Cuter Monday @ Making the World Cuter, Creative Share Blog Hop @ Trendy Treehouse, Motivate Me Monday @ Keeping it Simple, Mad Skills Monday @ Super Stinky Boys, It's So Very Creative Monday @ It's So Very Creative, and the DIY Project Parade @ The DIY Showoff, Tasty Tuesday @ Beauty and Bedlam, Tempt My Tummy Tuesday @ Blessed with Grace.
Monday, March 14, 2011
Leprechaun Cookies
You are getting sleepy…very sleepy…
This year, we are totally ready in our home to hypnotize any Leprechauns we catch and trick them into telling us where the gold is stashed! How? With these:

Thursday, October 11, 2018
Cheesecloth Ghost without Starch
I love the cute cheesecloth ghosts that everyone makes, but most of the tutorials I read required using starch to give the ghosts their shape. I didn't have starch on hand, so I was thrilled when I found a different technique that uses corn starch (which is still probably technically starch, but not the stinky spray kind)!
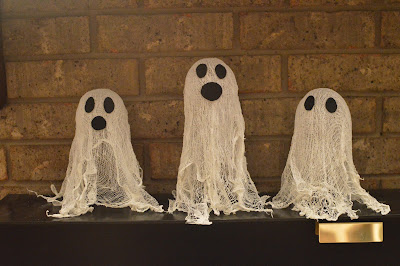
I found the idea at Love and Laundry...and I'm so glad I did. My kids had a blast making these ghosts.

I found the idea at Love and Laundry...and I'm so glad I did. My kids had a blast making these ghosts.
Thursday, April 24, 2014
Lego Rice Krispies Treats
In planning my 5 year old’s LEGO birthday party, I wanted treats that would be easy to serve and minimal mess involved, so when I saw the idea to make Lego Rice Krispie Treats, I knew it was right up my alley! First, make up a batch of Rice Krispies Treats…you will need:
 First, make up a batch of Rice Krispies Treats…you will need:
Thursday, December 8, 2011
Spice Ornaments
I think I made spice ornaments as a kid and when I saw the “recipe” to make them in my Everything Christmas book (page 14), I thought it would be fun to make them with my boys…sure enough, we had a blast and my kitchen smelled amazing for days!

All you need is equal parts cinnamon and applesauce. I used one cup of applesauce and one cup of cinnamon which was perfect to make several ornaments. It makes a very thick, crumbly dough…

Just roll it out on some wax paper and have your kids use their cookie cutters to make their ornaments. We had to use a spatula to transfer the ornaments so they wouldn’t break. Use a toothpick to poke a hole in each ornament.


Lay them out on a cookie sheet to dry for several days. Once they’re dry, your kids can paint them, or you can just hang them up with some thread on your tree…a fun, simple craft that you can keep for years to come.

I’ll be linking up to What Are Little Boys Made Of? Crafty Soiree, Making It With Allie, Show Off Your Stuff Party, Strut Your Stuff, and Christmas Craft Link Party.
Monday, October 17, 2011
Fall Leaves Placemat
The leaves are finally starting to fall here and though so far they are only yellow and brown I am seeing promise of more vibrant colors soon. To celebrate, we made placemats out of leaves and they actually lasted a couple of days at the dinner table :).

All you need are some beautiful fall leaves to press, wax paper and an iron…to learn how to make your own, click here.
I’m linking up to Family Time Tuesday.
Monday, July 19, 2010
Edible Finger Paint
Though K doesn’t enjoy getting his hands messy unless it’s in dirt, he was more than willing to try this finger paint because we made it out of pudding! It was so much fun, and we got to eat the leftovers!
All you do is…
Mix pudding according to directions…
Seperate into different bowls and add food coloring…
Paint until your heart’s content, learning valuable life lessons such as how to lick your fingers…I did see at Twelve Crafts for Christmas the idea to use wax paper and think it would be fun to try next time.
And, like I said before, enjoy the leftovers :)
Thank you to The Pumpkin Patch for the fun inspiration!
I’m linking up to Tot Tuesdays @ Delicious Ambiguity, Mad Skills Monday @ Super Stinky Boys, and Making Monday Marvelous @ CRAFT.
All you do is…
Mix pudding according to directions…

Seperate into different bowls and add food coloring…
Paint until your heart’s content, learning valuable life lessons such as how to lick your fingers…I did see at Twelve Crafts for Christmas the idea to use wax paper and think it would be fun to try next time.

And, like I said before, enjoy the leftovers :)

Thank you to The Pumpkin Patch for the fun inspiration!
I’m linking up to Tot Tuesdays @ Delicious Ambiguity, Mad Skills Monday @ Super Stinky Boys, and Making Monday Marvelous @ CRAFT.
Saturday, May 19, 2012
Salt Dough Handprint
If you’re wanting a fun, frugal way to capture this moment in time for your child, make a salt dough handprint!

Honestly, I love just holding this little handprint and tracing my fingers around each of the fingers, just in awe of how small but how amazing my son is.
To make your own little memory of your child, mix up a batch of salt dough. Roll out a ball of dough on some wax paper and have your child press their hand into it. Use a toothpick to make a little hole in the top and maybe write the initials and age of the child somewhere. You can neaten up the edges as well.
I recommend just leaving your handprint out to dry in a safe place for several days. I think ours took almost a week, but I tried baking other salt dough projects in the oven and they got too puffy and never really dried out :(.
This could be a great Father’s Day gift or something for grandma and grandpa!
I’m linking up to What Are Little Boys Made of and Preschool Corner Friday.
Subscribe to:
Posts (Atom)