expr:class='"loading" + data:blog.mobileClass'>
Showing posts with label Ornaments. Show all posts

Monday, December 19, 2016

Handmade Ornament Round-Up

If you're looking for some cute gifts or fun craft projects to do with your kids, try making some of these ornaments this year!
Handmade Ornament Round-Up

Follow the links below to see how we made each one:
13. Popsicle Stick Sled Ornament

Or you can visit this ornament round-up for more ideas!

Wednesday, December 14, 2016

Popsicle Stick Sled Ornaments

Growing up, my mom had one of those Flexible Flyer Sleds. Somehow she would manage to fit herself with four kids on it, and we would go flying down the mountain sides! So, this year, I decided to make her some little Popsicle Stick Sled Ornaments to put on her tree since we're too far away to enjoy her sled with her this year.
Popsicle Stick Sled Ornament
All you need to make your own is: Popsicle sticks, wood glue, something to cut the sticks with (I use a small garden pruner), red paint, and twine or yarn.

Wednesday, December 7, 2016

DIY Pokeball Ornament

I never thought that fads I loved in middle school would be what my children are into, but Pokemon is one of those that my boys are obsessed with. My 2 year old daughter knows more Pokemon names than I thought possible thanks to her big brothers! So, this year we made some Pokeballs to decorate our Christmas tree with:
DIY Pokeball Ornament

Monday, December 5, 2016

Felt Mitten Ornament

These felt mitten ornaments are perfect for making as little add-ons to Christmas gifts this year, or for having your kids make to teach them basic sewing skills!
Simply cut out a basic mitten shape from two pieces of felt. Cut out some rectangles of white felt for the cuffs, and start sewing the pieces together (or have your kids do it).

Leave a hole big enough to stuff some poly-fill inside, sew a ribbon to the top to hang it with, and sew the opening shut.

You can easily add embellishments like buttons, lettering (I did my son's initial and the year-14).

Here's my inspiration for this ornament.

Monday, November 28, 2016

Hand Print Snowman Ornament

I've seen the ornaments that have children's hand prints turned into snowmen for years and just barely made a hand print snowman ornament with my 2 year old. I love it!
Hand Print Snowman Ornament


Wednesday, December 16, 2015

Handmade Owl Ornament

How cute is this felt owl ornament?!
Homemade felt owl ornament
I made one for my daughter since her brothers have light-saber ornaments this year. 

To make your own, go to Juicy Bits for the directions and template.

Friday, December 11, 2015

Felt Light-saber Ornament

Is your house as Star Wars obsessed as mine is right now? Our family dressed up in a Star Wars theme for Halloween, we have tons of Star Wars Legos, and my boys begged me to make them light-saber ornaments this year...
Felt Lightsaber Ornaments

I'm pretty pleased with how they turned out! I free-haned the whole thing, but the handle was a grey rectangle, which I stitched the black details on. The blade was cut like so:
Felt Lightsaber Ornaments
Once all the pieces were sewn together, I started sewing it closed at the tip of the blade, and stuffed with cotton as I sewed. I sewed in a piece of yarn to hang it with (my boys picked purple yarn of all colors!), and tried it in various places to find the best balance point. The ornament is about the thickness of a pencil.

I also added their first initial and '15. I hope these are something they enjoy pulling out each year and that these ornaments will remind them of my love for years to come.

Monday, December 7, 2015

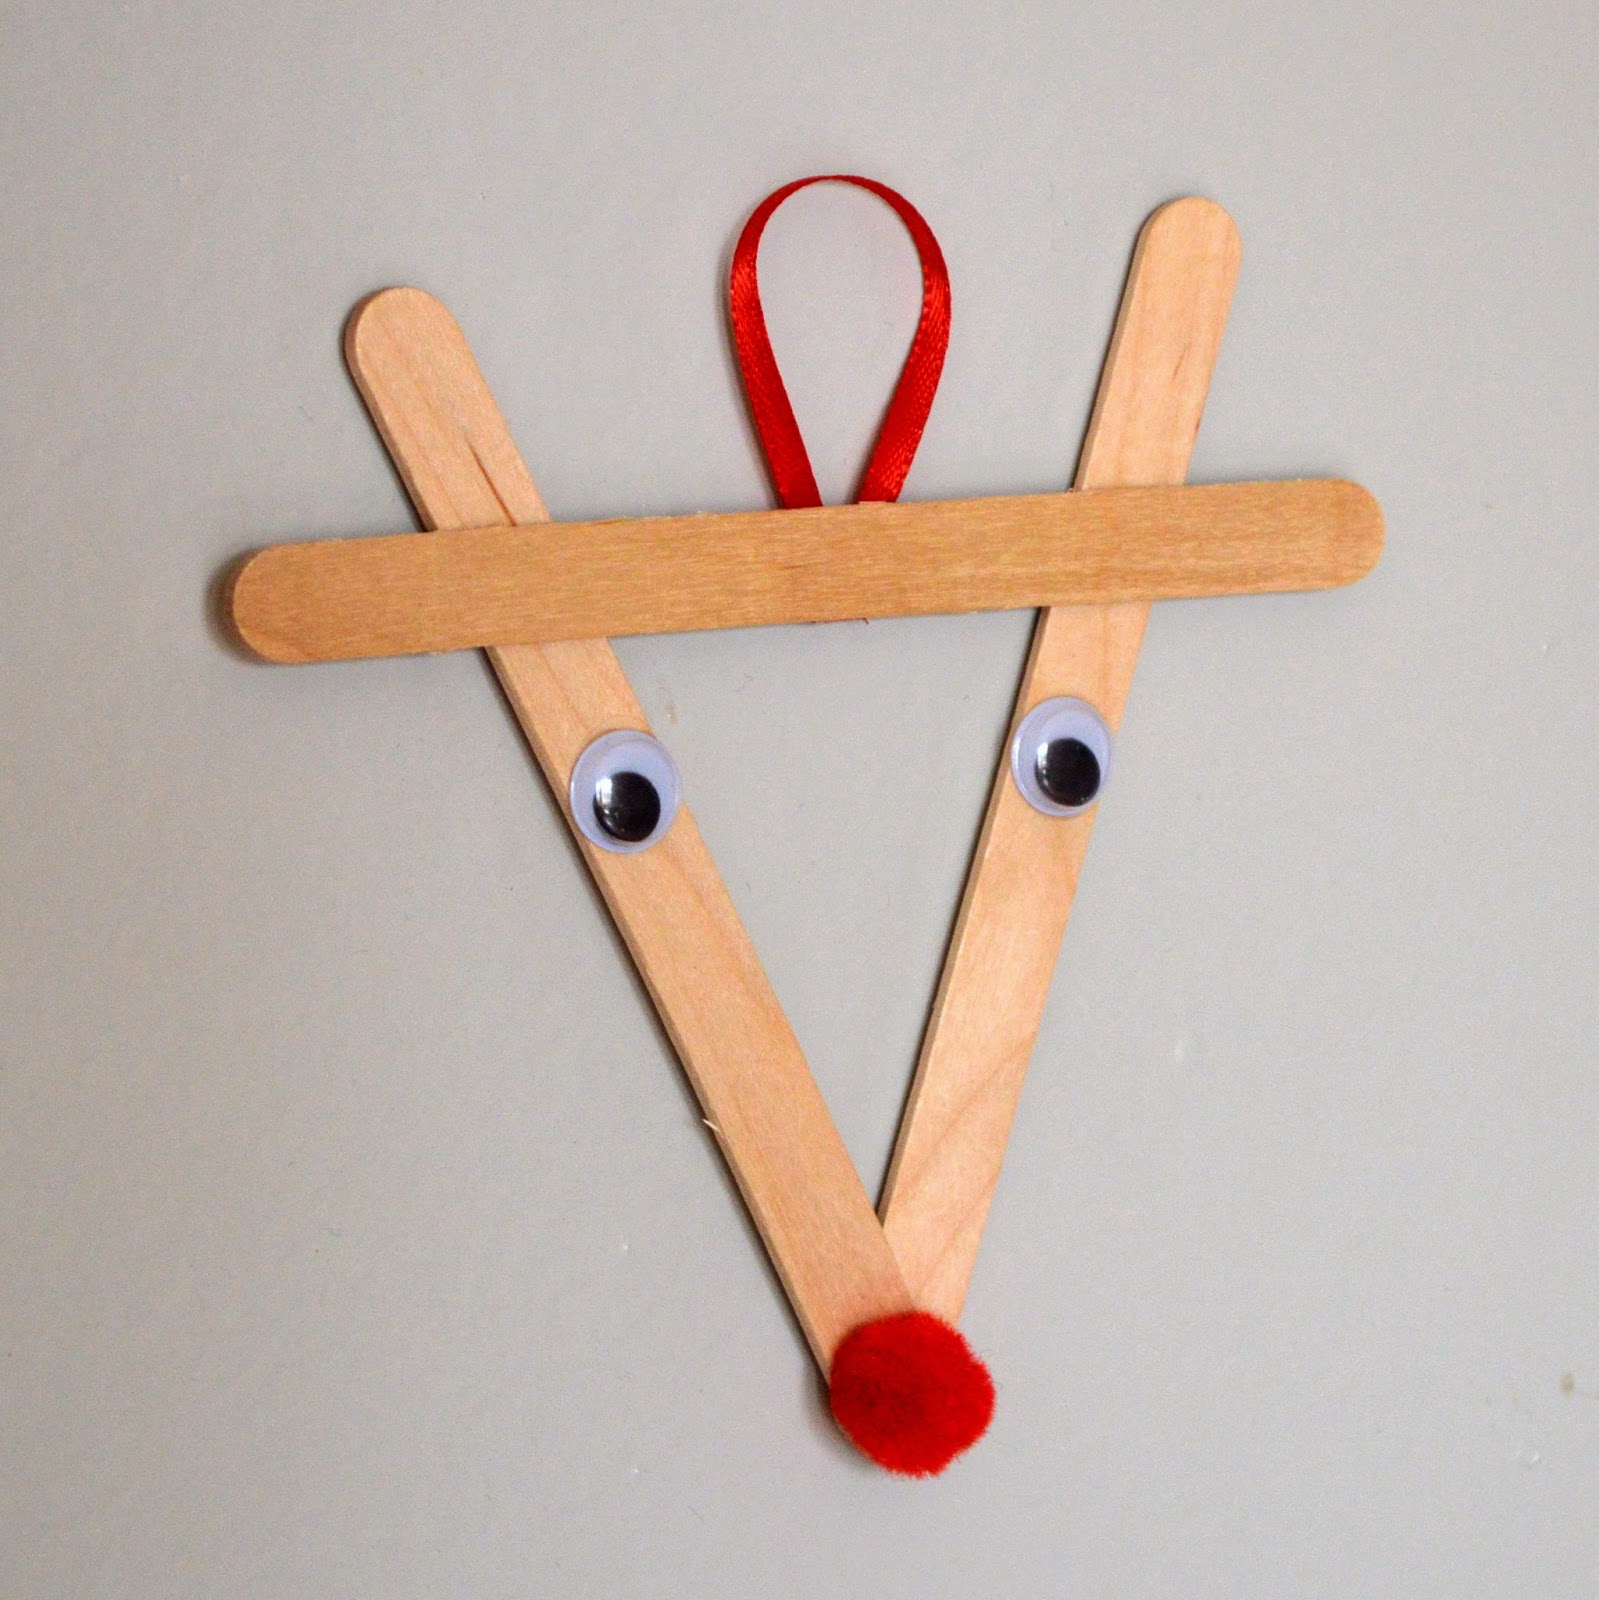
Popsicle Stick Reindeer Ornaments

I don't know how I spent most of my life without making one of these Popsicle Stick Reindeer Ornaments before, but somehow I missed out as a child since everyone else seems to have made them. Now, I get to live vicariously through my children's crafts!
Popsicle Stick Reindeer Ornament

Tuesday, December 1, 2015

Popsicle Stick Snowflakes

We go through a lot of Popsicle sticks in our house. They are so affordable and versatile! Plus, they are easy for little hands to work with. These snowflakes were a breeze for my boys to make and they needed very little help from me.
Popsicle Stick Snowflakes @ whatilivefor.net

Friday, December 12, 2014

Popsicle Stick Christmas Tree Ornament

We go through a lot of popsicle sticks around here. Recently, my 5 year old and I made Christmas trees out of popsicle sticks, and it was interesting seeing his unique twists on the classic. Mine is on the left, his is on the right (his reminds me of trees we made 2 years ago):Popsicle Stick Tree @ whatilivefor.net Popsicle Stick Tree @ whatilivefor.net

Saturday, November 1, 2014

Sharing the Holidays with Febreze

Disclosure: This is a sponsored post for SheSpeaks/Febreze. I received products and compensation for this post. All opinions expressed are my own.

This will be my baby girl's first Christmas and I am so excited! I can't wait to see all three of my children during the holidays. There are so many wonderful things to look forward to from winter/Christmas crafts to the Christmas parade in our town. This year I just want to soak it all up, because time only seems to be going faster and I don't want to miss the wonder and awe in each of my children's faces.

Friday, December 6, 2013

Clothespin Ornaments

Last week I had a bunch of girls from our church over to make ornaments for the tree at church and these are what I came up with…clothespin ornaments:Clothespin Ornaments I was really pleased with how they turned out and how easy they were to make…

Santa Clothespin Ornament Santa just requires the bottom 2/3rds of the clothespin to be painted red. Cut out a thin strip of black felt for the belt and draw on black buttons. Cut out a white felt beard and a red felt hat. Add some eyes and you’re done! Clip it to your tree.

Reindeer Clothespin Ornament The reindeer needs to be painted brown first. Then hot glue on a small red pom-pom, paint on some eyes (or add some googly eyes), and hot glue a pipe-cleaner folded into antlers on. My boys insisted my reindeer needed to be a bit more feminine with a pretty little flower.

Snowman Clothespin Ornament For the snowman, paint it white. Then use a toothpick to add dots of black for the buttons, mouth and eyes. Paint on a carrot nose. Hot glue a felt hat and you’re done!

I’ll be linking up to: Works For Me WednesdayMom’s Library, Let's Hear it For the Boy! Clever Chicks Blog Hop,Share it Saturday, Fine Craft Guild,Share Wednesdays, TGIF. Kids Get Crafty, The Mommy Club

Monday, December 2, 2013

Ornament Round Up

I am definitely not the type to have an elaborate, coordinated Christmas tree…I love having random ornaments that we have collected over the years. I especially love the ornaments we have made! Here’s a round up of some of those ornaments (hover over the picture for a description, and click the picture to be taken to the link):

Bottle Cap Snowman OrnamentsPopsicle Stick Nativity OrnamentPopsicle Stick Christmas Tree OrnamentSpice OrnamentsBottle Cap Reindeer OrnamentsWacky Kids Photo OrnamentPhoto Transfer OrnamentsSilhouette OrnamentsPipe Cleaner Candy Cane Ornament

Tuesday, December 18, 2012

Popsicle stick Christmas tree

I love popsicle stick crafts…they are easy, the kids love them, and they are very affordable! Last week we made these cute little popsicle stick trees:

Popsicle Stick Tree Ornaments @ What I Live ForPopsicle Stick Ornaments @ What I Live For

My 3 year old loves the color pink (in case you couldn’t tell by the tree) and my 5 year old is becoming more and more detail oriented in crafts…it’s so much fun seeing both of their personalities as they grow up :)

To make the tree, take 7 popsicle sticks and cut each one slightly shorter than the other…I just cut them with pruning shears and estimated how long I wanted each stick. I also cut off the rounded ends so the sticks would all have flat ends.

Have your kids paint the branches, and another stick which will be the “trunk”.

Hot glue the branch sticks on to the trunk and let cool. You can also glue on other “ornaments” such as beads, pom poms, sequins…my 5 year old found a random star bead so we glued that on top of his tree.

Glue a ribbon on the back and you have a cute ornament!

I’m linking up to Works for me Wednesday, Kids Get Crafty, Mom’s Library, Mommy Solutions, What are Little Boys Made of? Creative Share Blog Hop,

Monday, November 26, 2012

Wacky Kids Bookmarks

If you’re looking for a fun, simple gift to give to grandparents this year for Christmas, try these out:Kids Photo Bookmarks

I fell in love with the idea as soon as I found it on Pinterest linked to Creative Family Moments. These are wonderfully simple to make and they turn out so cute! Come to think of it, these could make really cute little ornaments too…

To make your bookmarks just have your children pose like they are holding onto a rope and snap a few pictures…the sillier the faces the better.

Friday, December 16, 2011

Photo Transfer Ornaments

If you’re looking for a last minute, meaningful gift for someone in your life, make them a photo transfer ornament. These are fairly simple to make and can definitely leave a lasting impression! P1020707

I made this ornament for my aunt using a picture of Munich I found online because she took me there just before I got married. On the back I transferred the words Merry Christmas…We love you!

To make your own ornaments, just follow the directions for Mod Podge photo transfer in my Light Switch Cover post, or my Popsicle Stick Puzzle post using a small wooden disc you can find for super cheap at Hobby Lobby or other such stores.

I’ll be linking up to Fun Stuff Fridays, Christmas Craft Link Party, Frugal Friday, Frugalicious Friday, and Friday Fun Finds.

Thursday, December 8, 2011

Spice Ornaments

I think I made spice ornaments as a kid and when I saw the “recipe” to make them in my Everything Christmas book (page 14), I thought it would be fun to make them with my boys…sure enough, we had a blast and my kitchen smelled amazing for days!P1020676

All you need is equal parts cinnamon and applesauce. I used one cup of applesauce and one cup of cinnamon which was perfect to make several ornaments. It makes a very thick, crumbly dough…P1020664

Just roll it out on some wax paper and have your kids use their cookie cutters to make their ornaments. We had to use a spatula to transfer the ornaments so they wouldn’t break. Use a toothpick to poke a hole in each ornament.

P1020665P1020667P1020669

Lay them out on a cookie sheet to dry for several days. Once they’re dry, your kids can paint them, or you can just hang them up with some thread on your tree…a fun, simple craft that you can keep for years to come.

Spice Ornaments

I’ll be linking up to What Are Little Boys Made Of? Crafty Soiree, Making It With Allie, Show Off Your Stuff Party, Strut Your Stuff, and Christmas Craft Link Party.

Monday, November 28, 2011

Bottle Cap Reindeer Ornaments

In case you hadn’t noticed, I’m on a bit of a bottle cap rampage right now and am loving all the different ways you can reuse little metal bottle caps…just more proof to me that just about everything can be recycled! Anyhow…P1020571

All you need to make these darling ornament is some brown paint, white and black paint (or googly eyes), and a little red for the nose. Hot glue small twigs on for the antlers and hot glue a ribbon on the back to hang up your darling ornaments and you are done!

I’ll be linking up to Christmas Crafts Link Up, Make it 4 Monday, Motivate Me Monday, Market Yourself Monday, Mad Skills LInk Party, Homemaker Monday, Making Monday Marvelous, Monday Blog Hop and Mommy Monday.

Friday, December 17, 2010

Silhouette Ornaments

I was fortunate enough to share this tutorial in a guest post on Crazy About My Baybah, Family and Life in Las Vegas, and The Life of a Sippy Cup Mom a month ago and wanted to have the tutorial available on my blog as well. 

Each year growing up, my parents would buy each of us kids an ornament. We had our own themes that my mom would try to stick to. I always had rocking horses or angels. Apparently this was a tradition my paternal grandparents had with my father as well! When we got married, my hubby and I decided to continue the tradition with our own twist. Each year, our family’s ornaments have a different theme. One year we each got a nativity, another nutcrackers, etc.

I also love the idea of framing and hanging up silhouettes of my children, but in our apartment, we are very limited on how many holes we put in the wall. So this, year, we are each getting our own silhouette ornament!DSCN4383
All you need are a round piece of wood the size your want your ornaments to be for each member of your family. I bought mine at Hobby Lobby for 70ish cents and they are 2 inches wide. DSCN4034
Drill a hole in each of your discs for the hanger to go through. Did you know dremel tools can drill? I seriously didn’t until this project!DSCN4035
On the back, I used Mod Podge to transfer our printed names and date. For my boys I used their first and middle names, but just used Mommy & Daddy for my husband & I. Click on the link above to see more detailed instructions and other ideas for photo transfer techniques with Mod Podge. DSCN4386
To transfer ink, print out the text backwards. Cover the paper with Mod Podge (not too much) and adhere to your disc. Rub thoroughly to make sure there are no air bubbles.

Let dry. I would wait several hours, if not an entire day. Spray the paper with a little bit of water and start rubbing gently with your fingers. The paper fibers will start to rub off and you’ll begin to see the text (or image). Keep rubbing until there are no more fibers. If there are some left, when it dries your image will look somewhat ghost-like. If the text starts tearing, set it down, let it dry and come back with a gentle touch, spraying and rubbing.
 DSCN4376DSCN4377
For the front, I made everyone in my family stand against a white wall and shot a few pictures of their profile. I then took those pictures into paint.net and erased anything around them. DSCN4097
I’m not terribly computer minded, so I literally just printed out the profiles, cut them out and used a Sharpie to color them black :). Mod Podge your silhouettes to the discs and let dry. DSCN4099
Coat both sides with additional Mod Podge and if desired spray with an acrylic sealer (12 oz for under $6 at Walmart!) for more durability.DSCN4385

These are perfect for your own tree or for cute little gifts for Grandma and Grandpa! Have fun crafting!

I'm linking up to Frugalicious Friday @ Finding Fabulous, Frugal Friday @ The Shabby Nest, Friday Link Party @ Creation Corner, Everything But the Kitchen Sink @ A Little Knick Knack, and Crazy Cute Link Party @ Between U & Me.

Tuesday, November 30, 2010

Bottle Cap Snowman Ornaments

Are you ready for an onslaught of Christmas/holiday related crafts and gift ideas? I hope so because it’s already started! Have I mentioned my husband never thought I would turn crafty on him? Apparently I wasn’t crafty before I started blogging. Luckily he still loves me :)

Back to the topic at hand…Bottle Cap Snowman Ornaments! These are simple, cute and cheap (my favorite). DSCN4537
All you need are:
  • Bottle caps. 3 to each snowman unless you want to make mutant snowmen for your younger brother or something…
  • White paint
  • Something to color with. I used a sharpie and orange highlighter
  • Glue gun
  • Ribbon
Start by making sure your bottle caps are clean and dry.DSCN4531
Give them a few coats of white paint, allowing to dry between each coat especially if you have cheap paint like me. DSCN4533
Fold a little bit of ribbon into a loop and hot glue that to the top of one of your bottle caps on the back. Add another dab of glue at the bottom. Glue the ribbon to two more bottle caps and trim the end. I like having a bit of ribbon show between each cap to add color.DSCN4535
Draw cute snowman faces and button on your ornaments and adorn your tree with cuteness! Sorry, is that too girly? My faces/buttons are a little crooked because I drew them on before gluing…yah, draw them on after the ribbon is glued on.DSCN4538
I’m linking up to Get Your Craft On @ Today’s Creative Blog, Nifty Thrifty Tuesdays @ Coastal Charm, Lucky Linky Tuesday @ Lucky Star Lane, Toot Your Horn Tuesday @ A Silly Little Sparrow, Tip Me Tuesday @ Tip Junkie’s, Polka Dots and Pizza. and Show Me Your Bush.