I had seen the idea all over Pinterest (517 Creations and Etsy) and knew that I could make my own...here's what you need to make your own:
- A piece of wood: 1x8x6. We got ours from Home Depot.
- Sand paper
- Stain/paint
- A pencil
- A ruler/measuring tape
- A permanent marker
- Select your wood. Try to pick one that is straight (not warped), and doesn't have any huge knots.
- Sand the wood until it's smooth.
- Stain the wood. I chose a light stain so it would be easy to see the ruler marks/growth marks over the years.
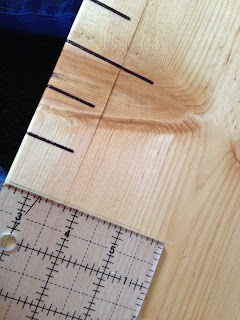
- Once the wood is dry, use a ruler to mark every inch along the side of the board. I started marking it at 6 inches, so that it went to 6 1/2 feet (since ours was going to be hung on the wall). For our growth chart, every inch mark is one inch long. Every six inches is 2 inches, and every foot is 3 inches (see the picture below). I used pencil first, then went over it with permanent marker (using a ruler to make sure my lines were straight).
- Print out the numbers 1-6 in a font/size you want.
- This is how you will transfer the numbers to your board:
- Cut each number out like the picture below
- On the back of each number, color it thoroughly with pencil (see 517 Creations for her explanation of this step). Cover everywhere the number covers.
- Tape the numbers to your board where you want them to be.
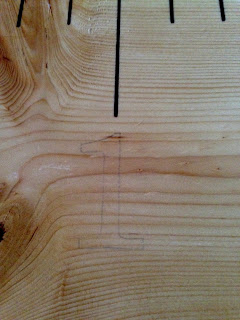
- With a ball point pen, trace the numbers. The lead on the back of the paper will leave the tracings on your board. You can see how mine turned out below:
- Take the paper off and use a permanent marker to outline the numbers. Then color in each of the numbers with the permanent marker.
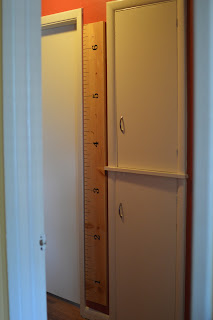
- There are probably a lot of different ways to hang this. My husband drilled holes in the top and bottom of the board, then put a screw through and attached it straight to the wall. We made sure to measure six inches from the floor. We chose this method so our kids couldn't just pull the growth chart off the wall.
- When we moved, we just unscrewed it, filled in the holes, and did the same process in our new home!
- I filled in all of the measurements we already had of our kids. I just used their first initial and the age they were. Now my kids know that each birthday they get to be measured and see how much they've grown in the past year. I love that this growth chart will last for our family, and one day maybe our grandkids can be measured on it too, to compare their growth to their mom or dad :).


No comments:
Post a Comment
Comments